Setting up Mavensmate to works together with Eclipse project
Mavensmate is a great development tool which makes salesforce developer lives much easier, but from time to time working with Force.com plugin for Eclipse (Force.com IDE) can be more convenient. I see the following pros and cons for Mavensmate and Force.com IDE
Mavensmate Pros:
- Speed. Yeah, mavensmate is very fast.
- A great set of plugins which is available for Sublime Text
- Many great things like code folding, bookmarks, etc. which provided out of box for Sublime Text, but are unavailable in Force.com IDE.
- Mavensmate stores your apex-scripts which were run anonymously
Mavensmate Cons:
- Sometimes this tool has a trouble during saving to server when it shows a diff dialog although conflict doesn’t exist
- Working with some type of resources is more comfortable in Force.com IDE
Force.com IDE Pros:
- Eclipse is a "true IDE" when Sublime Text is more a text editor with a few IDE features
- Has handy synchronization/comparison tool
- Has good integration with Apache Ant and Jenkins CI
Force.com IDE Cons:
- Usually a new release comes 3 times per year with Salesforce.com releases. Thus a new features come only 3 times per year. (for now Force.com IDE became open source and might be it’ll speed up a feature development and releases)
- Might be pretty slow and usually it’s slow, very very slow
- Has no hot-key for saving to server. OMG
Thus it might be very handful if we can use single workspace for both IDE. Here is the step by step instruction which shows you how to configure such workspace.
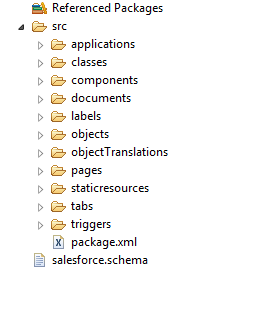
1. Setup Eclipse project. That’s simple task I guess. Let’s say you have the following project structure. It’s very typical structure and I guess that you will have pretty similar project.
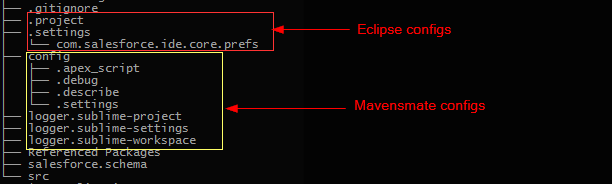
2. Download a configs which were copied from another mavensmate project. Copy these files in the locations which showed on screenshot below. As you can see you have to copy 4 files to config directory (which you have to create) and 3 files to the project root directory (these files should have the same name as a project).
3. After that open config/.settings and enter a needed parameters
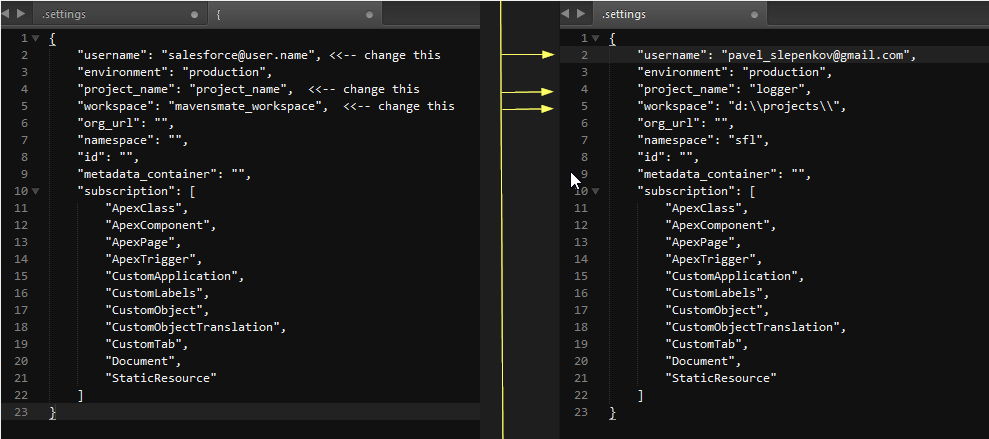
workspace and project_name should be the same as Eclipse workspace and project name.
When you completed these changes you can open Sublime Text and go to Mavensmate menu and open the project.

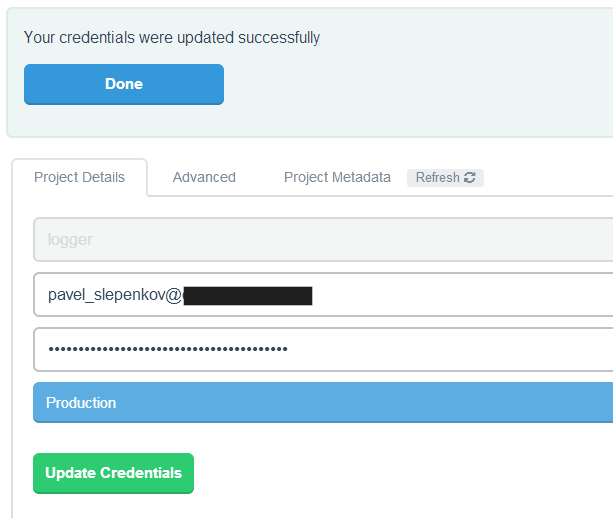
4. Now open MavensMate menu again and select Project → Edit Project. Update credentials and click “Done”.
 5. Reset the metadata container
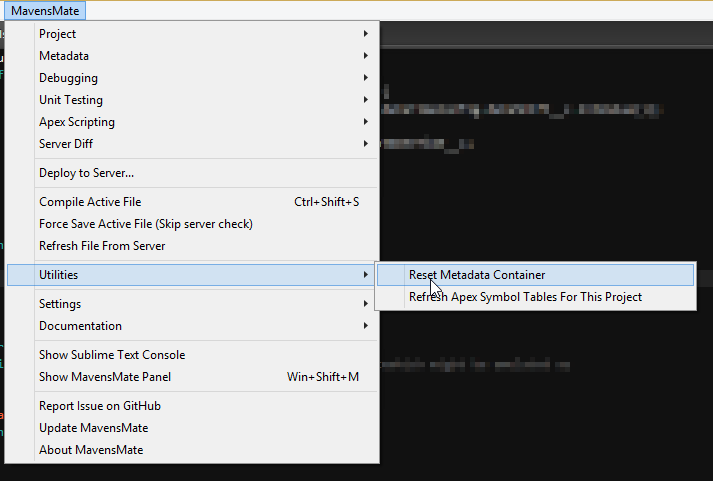
Now your project is ready to work. Good coding!